
Expense reports are designed to make it easier to record business expenses paid by an accountable person using cash or their personal bank card.
Expense documents paid from the company cash register can also be entered here. However, they must be entered in a separate report so that the actual use of the company’s own funds can be tracked.
Expense documents paid using the company’s bank card should continue to be entered in the Purchase Invoices section, as their payments must be matched with bank transactions in a timely manner.
An accountable person does not necessarily have to be included in the employee register (for example, a board member may purchase goods or services using personal funds but does not receive a salary from the company and is therefore not included in the employee register). Accountable persons are entered in the Partners (Customers/Suppliers) register.
Each company should decide how frequently expense reports are submitted and ensure that expense documents are recorded in the correct accounting period (for example, once a week or once a month).
Once an expense report is saved, a liability to the accountable person is created. No liability is created towards suppliers, and these expense documents will not appear in the purchase liabilities register.
Expense reports can be found in the menu Transactions → Expense and Travel Reports.
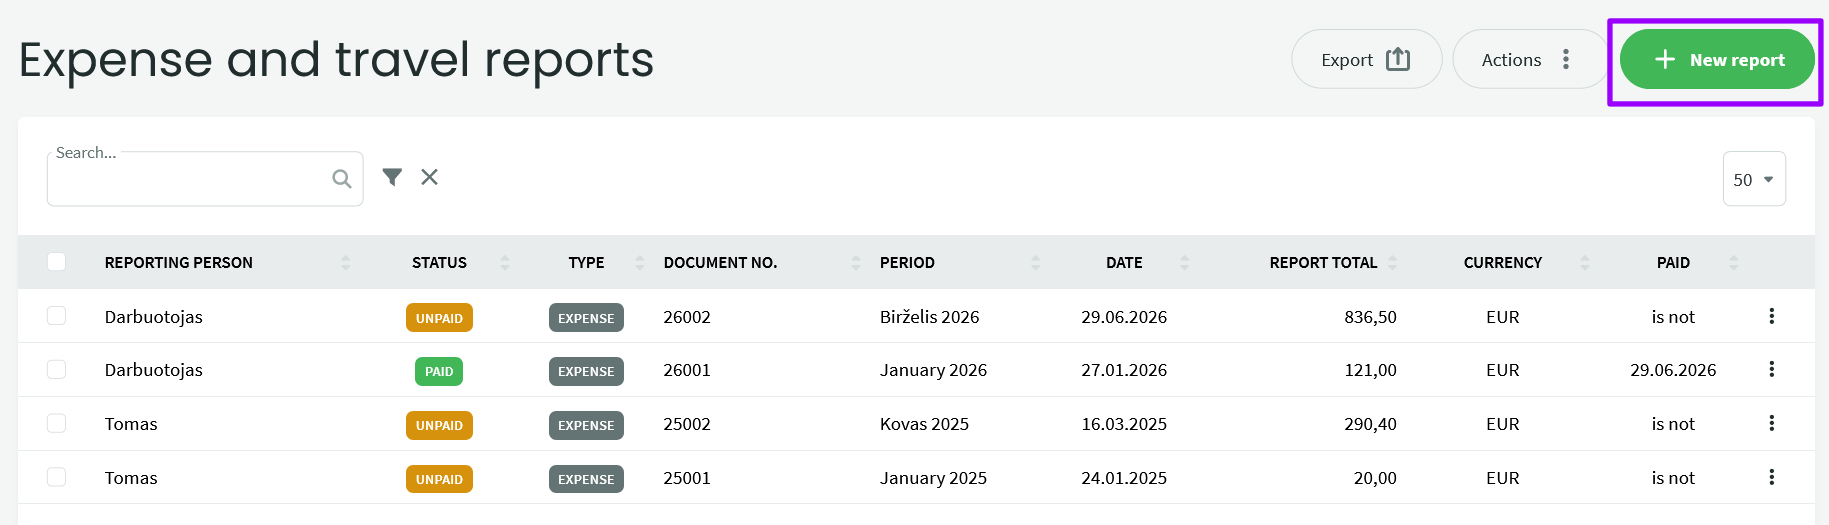
-
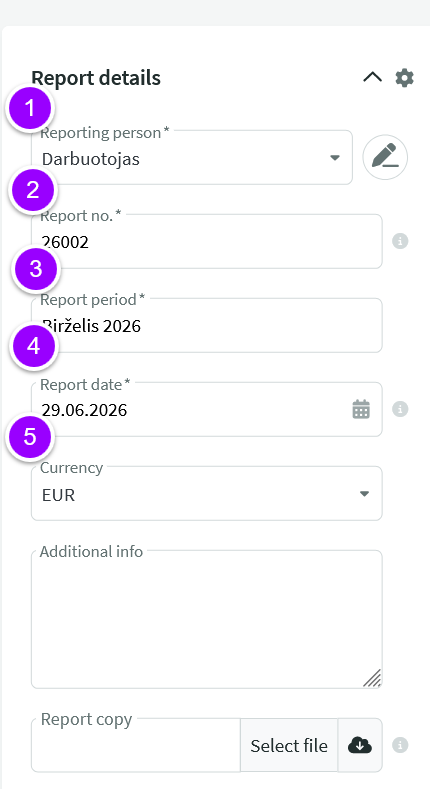
Accountable person – Add a new accountable person or search for an existing one. To create a new accountable person, only the name is required; all other fields are optional. You can later update the accountable person’s profile with bank account details.
2. Report number – Generated according to the numbering formula, which can be configured under Settings → Company Settings → Expense & Travel Reports → Report Number Formula.
3. Reporting period – By default, the current month and year are filled in automatically. You can change this to the appropriate reporting period.
4. Report date – By default, the report entry date is used. You can select a different date if required.
5. Currency – If the expense documents are in a currency other than EUR, you can change the currency used for the entire report. There is no need to convert the documents into euros beforehand. Please note: the selected currency applies to the entire report, so create separate reports for documents in EUR and other currencies. The required currency must be activated in advance.
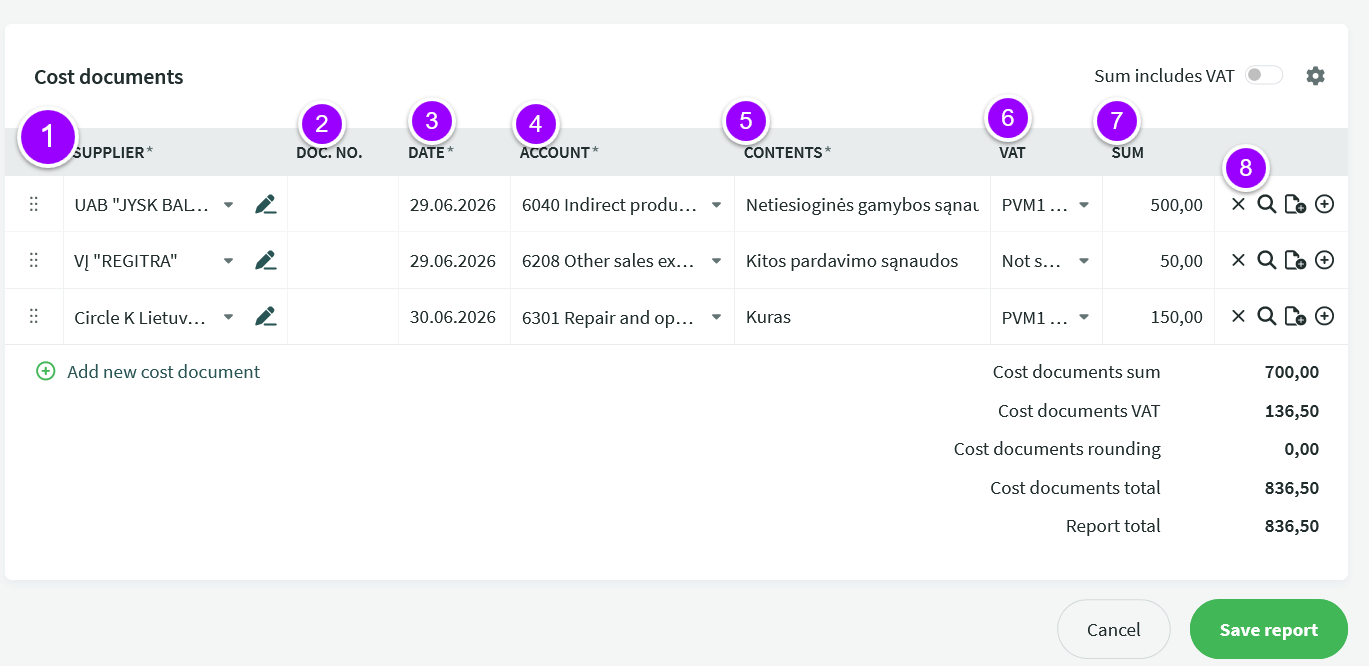
- Supplier – Select an existing supplier or create a new one. If an expense account and VAT type have already been assigned to the selected supplier, they will automatically be filled in for the line.
- Document No. – Expense document number.
- Date – Expense document date.
- Account – Select the appropriate expense account for the line.
- Description – By default, the expense account name is displayed here, but you can edit it as needed.
- VAT – Select the appropriate VAT iSAF code. By default, VAT1 is selected.
- Amount – Line amount excluding VAT.
- Delete icon (X) – Removes the expense document. Magnifying glass – Allows you to verify the total amount and VAT amount of the expense document and, if necessary, add a rounding adjustment. Document plus icon – Allows you to attach the expense document file. If a document has been attached, a green circle will appear on the paperclip icon. Plus icon – Adds another line to the same expense document. This is useful when a single document contains different types of expenses or lines with different VAT treatments.
To add a new expense document, click + Add New Expense Document.
Below the report lines you will see the total amount excluding VAT, the total VAT amount, and the total expense report amount.
Once all documents have been entered, save the report by clicking Save Report.
Expense reports can also be entered using VAT-inclusive amounts. To do this, change the Amount Includes VAT option (top right corner of the report) from No to Yes. This setting applies to the entire report, not to individual lines.
To record an advance payment to an accountable person, go to Operations → Payments → New Payment, select the accountable person’s name, and enter the payment amount and date. In the Additional Information field, you may enter a note such as “Advance payment”. Save the payment.
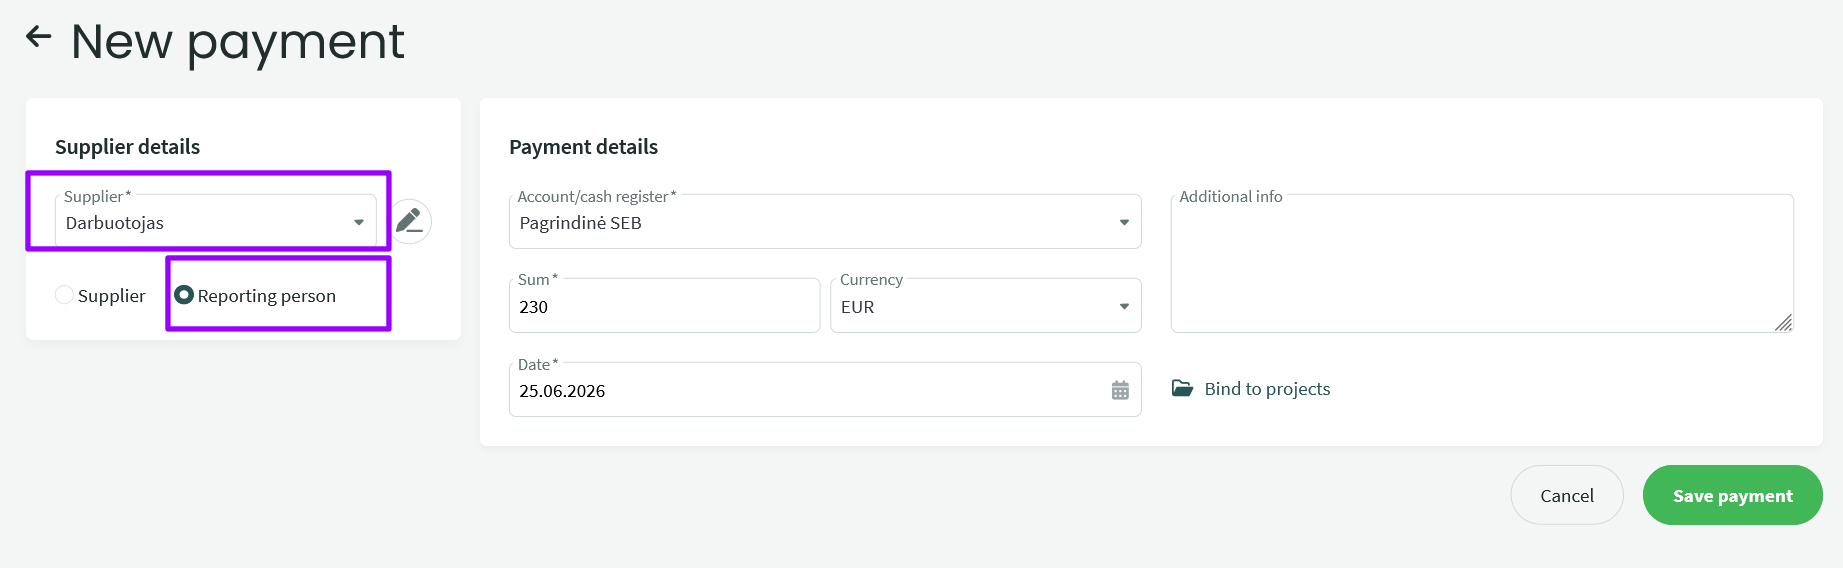
When marking the expense report as paid, you can immediately match it with the advance payment. If the advance payment does not fully cover the expense report amount, you can add another payment alongside it.
Payments related to accountable persons can also be managed by importing bank transactions.
a. Attach the purchase receipt or invoice for the goods to the expense report, but use the Goods Expense account (not the inventory account). In the Description field, you may specify what was purchased. Save the expense report.
b. To record the goods into inventory, go to Warehouse → Documents → New Document → Goods Receipt. When creating the goods receipt document, you will be able to select the appropriate inventory items. Once the document is saved, the goods will be added to inventory, and the goods expense will be reduced accordingly.
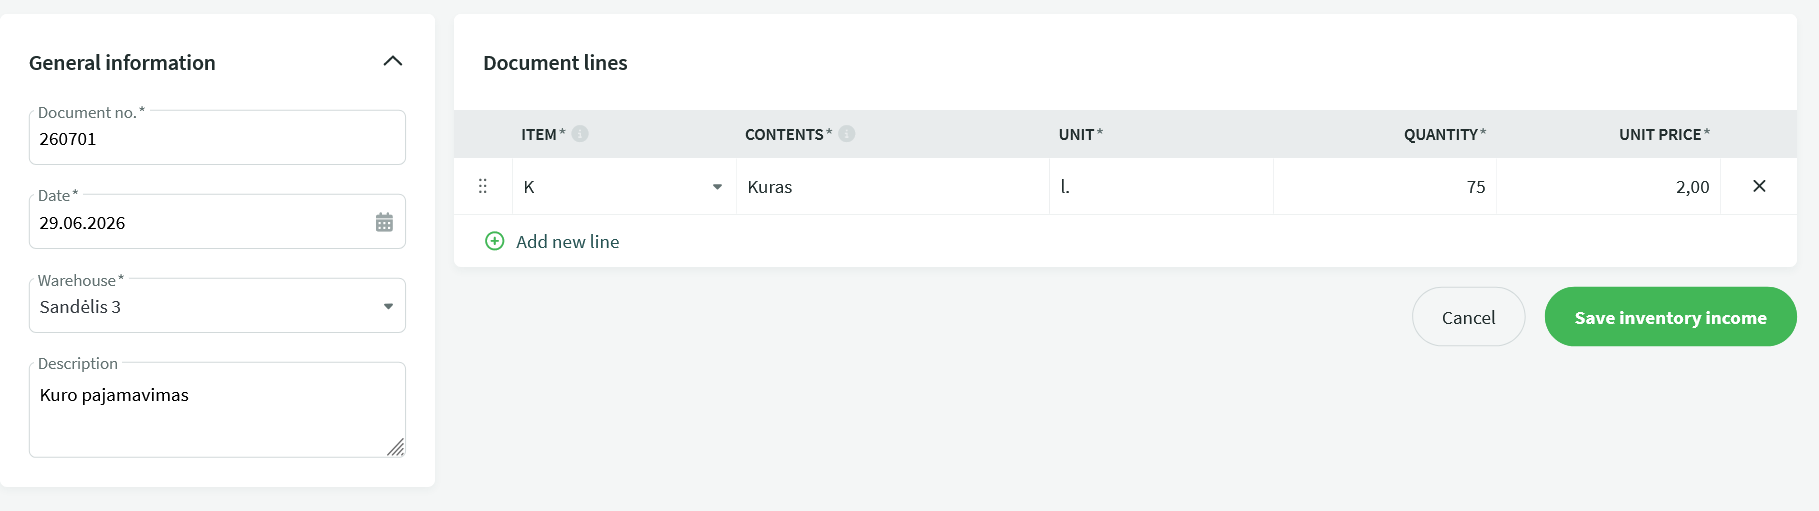
It is important that the amount (and date) of the goods receipt document exactly matches the invoice attached to the expense report.
c. To ensure the accounting entries are correct, open the goods receipt document and select Actions → Edit Accounting Entries. On the Credit side, enter the same expense account that was used in the expense report. The Debit side should already have been generated automatically according to the warehouse settings.
Tip You can check the balance of an accountable person in Reports → Accountable Persons. This report shows both outstanding liabilities to accountable persons and advance payments that have not yet been matched with expense reports.
Tip You can also review all transactions (payments and expenses) related to an accountable person by going to Partners, locating the accountable person, selecting Actions → View Transaction List, choosing the desired period, and generating the report.
If you have any additional questions, please contact us at support@simplbooks.lt.