When entering a purchase invoice for goods to be received into inventory, it is recommended that are added to the system in advance. You can also add a new item while entering the invoice, but you will need to complete the item details later. If you need to add a large number of items, you can also into the system.
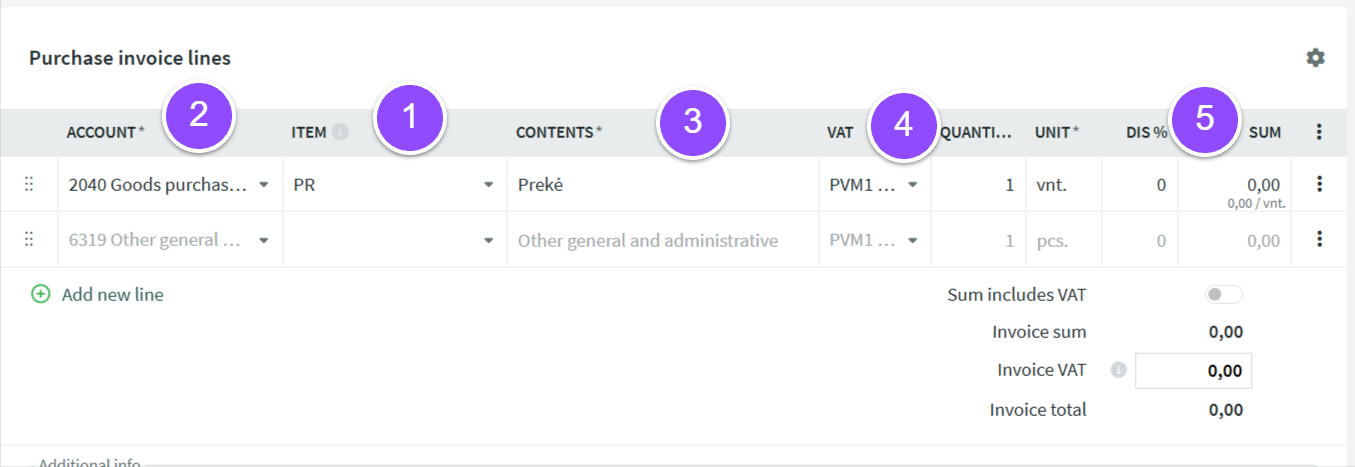
Create a new purchase invoice and start by entering the supplier and general invoice details. When entering the invoice lines, it is important to select the item first.
-
Item – First, select the item (if it has not yet been added, create it via Warehouse → Items → New Item).
-
Account – This field is automatically populated from the item details. It is the inventory account used to record the purchase cost of goods.
-
Description – The information entered in the “Name” field of the item card. This field is automatically populated from the item details.
-
Quantity – The quantity purchased.
-
Amount – The total amount for the invoice line. The unit price is displayed at the bottom of the field.
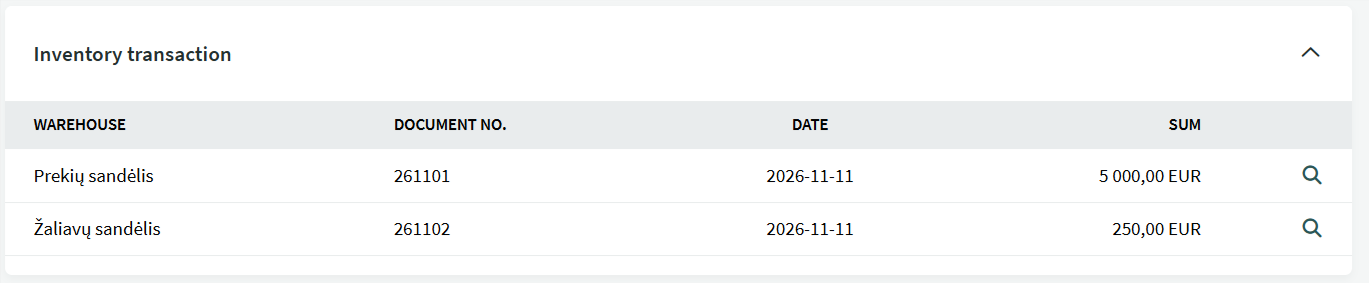
Once all the required items have been added to the purchase invoice and the invoice has been saved, the system automatically creates inventory warehouse transactions. The item document number(s) will be displayed in the “Inventory Transaction” panel. If the purchase invoice contains items linked to different inventory accounts, the goods will be received into the corresponding warehouses.
● Goods purchased from another EU Member State: When entering a purchase invoice for these inventory goods, pay attention to the VAT type (i.SAF code) and VAT report settings. The VAT report settings may need to be updated when entering the first intra-Community purchase invoice for inventory goods.
If you have any additional questions, please contact us at support@simplbooks.lt.