
This user manual deals with all issues concerning purchase invoices. If you are interested in information concerning a specific field, then read more under the relevant step shown on the images.
For more information about the introduction, read the text below or watch the video:
More details about the fields of a purchase invoice:
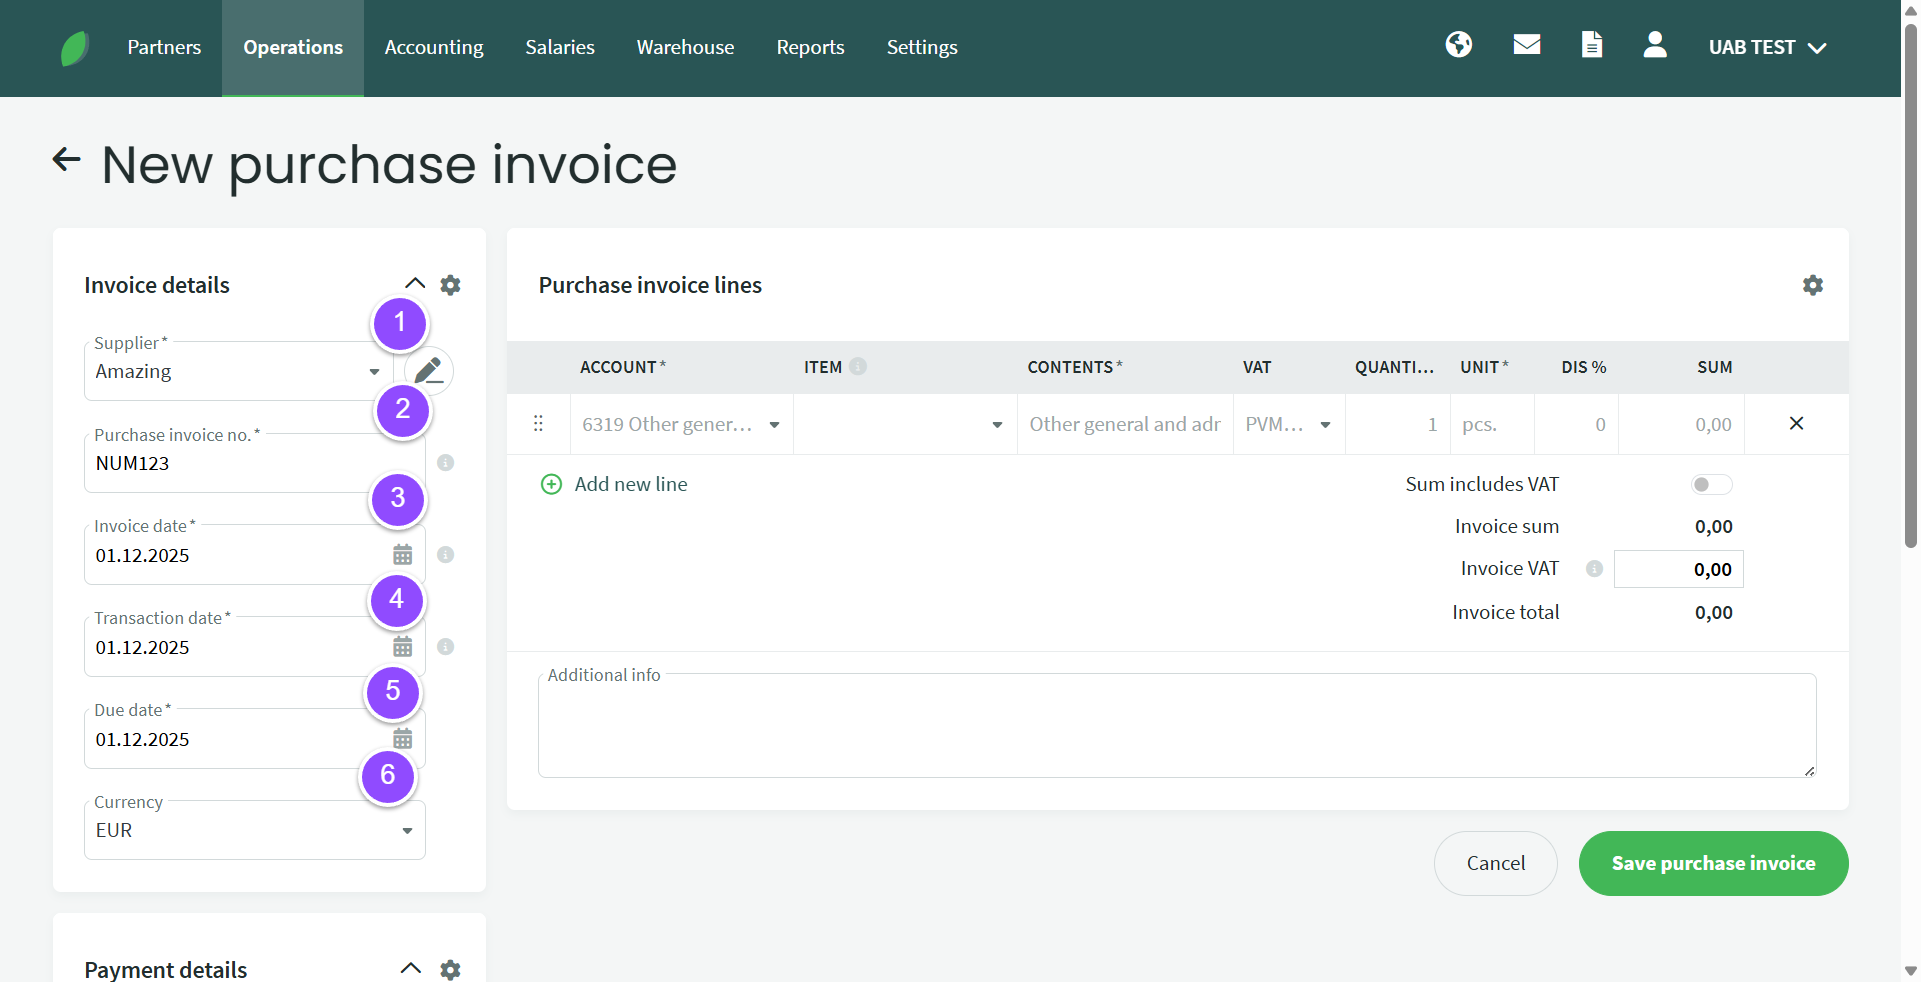
1. Supplier – you can select a supplier entered in the database or add a new supplier. If the supplier’s details are in the database, you must select the supplier from the list (when you start typing the name, the suppliers already entered in the program are displayed first). When you add a new supplier, they are added to the database when you save the purchase invoice
2. Enter the purchase invoice number. The invoice number counter can be pre-set, read more here: Setting the number counter formula.
3. Invoice date – The date on which the invoice was issued, as indicated by the supplier on the invoice
4. Transaction date – The date on which the accounting entry is made in the purchase invoice. This usually coincides with the invoice date, but sometimes it is necessary to use a date other than the document date. For example, the date of the expense document is the beginning of this month, but the service was received in the previous period. In this case, enter the last date of the previous month as the entry date
5. Pay by/due date – the payment deadline specified on the purchase invoice. If you wish, you can specify the agreed number of days for payment on the Supplier card
6. Currency – if the purchase invoice is in a currency other than euros, the appropriate currency must be selected. The required currency must first be activated via Settings -> .
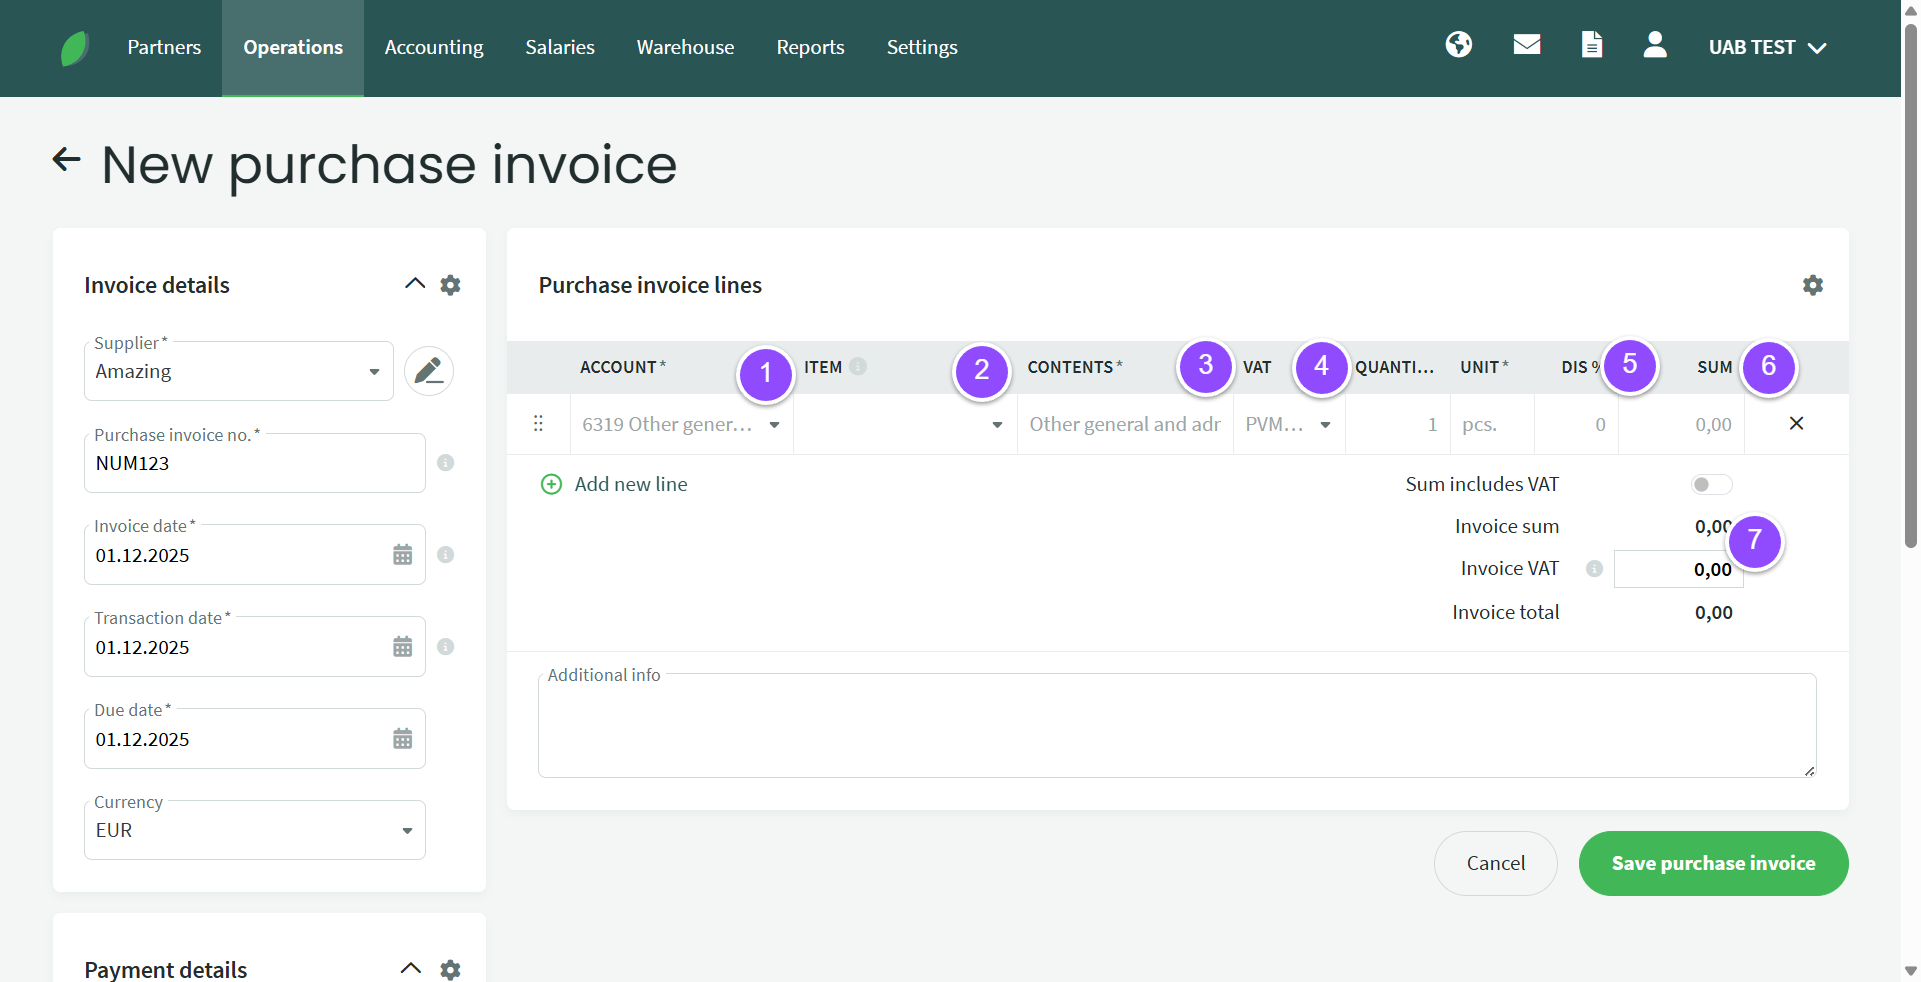
1. Account – mandatory field. The default expense account can be set in Settings -> Automatic Operations -> Purchase Invoices. The expense account linked to the supplier can be set in the supplier card. Accounts can be added and changed in Accounting -> Accounts.
2. Item – optional field. Required when purchasing and selling inventory items. When using a previously entered item/inventory, the “account” field is automatically filled in with the account specified in the item card. If you want to enter a new product, go to (preferably open in a new browser tab) Warehouse -> Items
3. Content – by default, the name of the accounting account is displayed here. If desired, the content can be rewritten
4. VAT – I-SAF class selection. The default setting is VAT1 – 21%. When purchasing reverse charge services and goods, you must also use the appropriate expense account (see VAT report) and select the appropriate VAT class (read more about them here). In order to deduct part of the VAT, the purchase invoice shows the full VAT amount, However, when saving the purchase invoice, it is recorded so that, for example, 50% of the amount goes to the main expense account and the other 50% is included in, for example, the non-deductible expense account line. If the company is not a VAT payer, the VAT class selection field is inactive.
5. Discount. Here you can enter the discount given for the item as a percentage.
6. Sum – the total amount of the invoice line, with or without VAT, depending on the selection made in the next point. If you adjust the quantity after entering the amount, the amount will change automatically.
7. Invoice sum- the total amount of the lines. Invoice VAT – VAT is calculated from the lines. Compare with the amount indicated on the purchase invoice and correct if necessary (there may be a difference of a few cents. N.B. You can only make corrections related to differences resulting from rounding off the VAT. No major differences can be corrected this way.). Total – the sum of the lines with VAT. Compare with the amount indicated on the purchase invoice.
Below the invoice line data, you can enter additional information, payment details, and attach a copy of the invoice in PDF or another format (you can find information about acceptable file formats by hovering your mouse over the information button). By clicking the “Select File” button, you can add a file saved on your computer. By clicking the “cloud” icon, you can choose from documents that have been imported into the program but not yet processed (imported via CostPocket, Envoice).
After entering the invoice details, click “Save invoice.”
● Attention! When you start working with the program, no entries will be made in the invoice until an initial balance is entered in at least one accounting account. Also, check the start date for automatic entries (Settings -> Environment settings -> Basic settings). Information on entering initial balances can be found here: Initial balance entry
If you have any questions, please write to us at support@simplbooks.lt

Leave A Comment?